寻找数据集的网站
https://www.visualdata.io/discovery
预处理RealEstate10K
RealEstate10K 数据集介绍-【大规模摄像机轨迹视频剪辑数据集】
PS:大小大约7TB
抓取 YouTube 上的视频,并以指定时间戳、帧姿态来剪辑。应用类似于视图合成的模型中,例如,在Google的SIGGRAPH 2018年SIGGRAPH论文《立体放大:使用多平面图像学习视图合成》中,在训练过程中从每个剪辑中采样了三帧帧,两个用于预测模型,第三个作为计算视图合成损失的ground truth 训练网络。
数据集由一组.txt文件组成,格式如下:
1 | <Video URL> |
同一个视频的剪辑帧大约90%在训练集、10%在测试集。
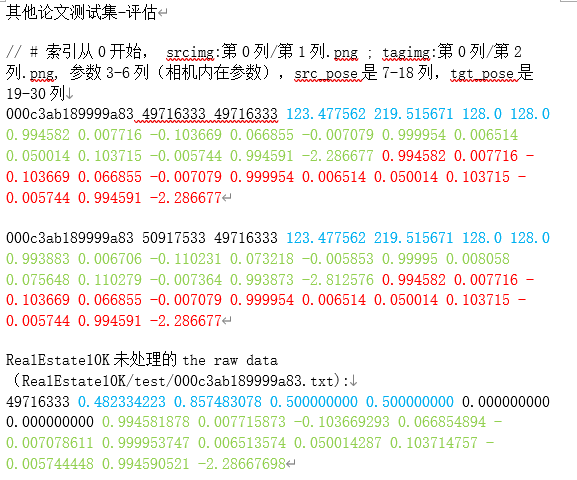
每个frame包括3个参数
第1列:时间戳(int,视频开始的微秒数)
第2-6列:相机内在参数(float: focal_length_x, focal_length_y,principal_point_x, principal_point_y),即3*3矩阵K
第7-19列:相机姿态(floats ,以行优先顺序的3x4矩阵,即3*4矩阵P = [R|t]

因此,KP将世界坐标系的(homogeneous) 3D坐标点映射到图片中(homogeneous) 2D点
相机内部特性以与分辨率无关(resolution-independent)的归一化图像坐标表示,其中图像的左上角为(0,0),图像的右下角为(1,1)。 通过像素大小对图像进行缩放,可以调整内在参数得到存储在磁盘上的任何分辨率帧(或在训练之前调整大小)。 对于分辨率为width x height 像素的图像,图像真实比例的K矩阵为

pytube是用于爬虫下载youtube上的视频库
1 | pip install pytube3 |
处理代码:
1 | python preprocess_RealEstate10K.py |
补充知识
相机模型
(像素坐标,图像坐标,相机坐标,世界坐标)的变换关系
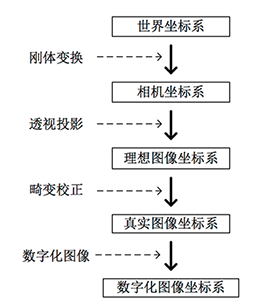
成像的过程实质上是几个坐标系的转换, 也可以被称为射影变换(更多关于射影变换的内容可参考《计算机视觉中的多视图几何》) 。首先空间中的一点由 世界坐标系 转换到 摄像机坐标系 ,然后再将其投影到成像平面 ( 图像物理坐标系 ) ,最后再将成像平面上的数据转换到图像平面 ( 图像像素坐标系 )
针孔相机模型(最简单):
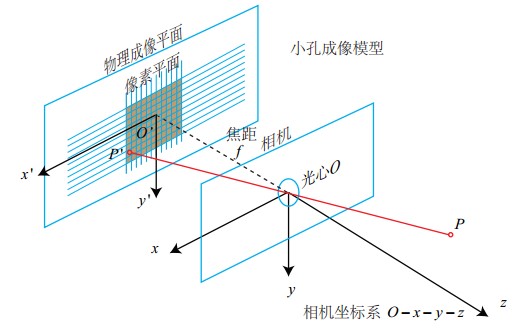
相机坐标系(三维坐标系)
相机的中心被称为焦点或者光心(principal point),以焦点Oc为原点和坐标轴Xc,Yc,Zc组成了相机坐标系图像坐标系(二维坐标系)
成像平面中,以成像平面的中心O′为原点和坐标轴x′,y′组成了图像坐标系。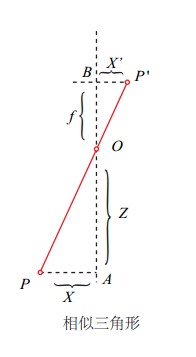
由相似三角形得出:
$$
\left{
\begin{array}{l}
x = f\frac{X}{Z} \
y = f\frac{Y}{Z} \
z = f
\end{array}
\right.
$$
通过扩展坐标维度构建齐次坐标 ,将z线性化
$$
\left[\begin{array}{c}x\y\end{array}\right] \Leftrightarrow
\left[\begin{array}{c}\hat{x}\\hat{y}\\hat{z}\end{array}\right] =
\left[\begin{array}{ccc}f&0&0&0\0&f&0&0\0&0&1&0\end{array}\right]
\left[\begin{array}{c}X\Y\Z\1\end{array}\right]
$$
具体步骤就是将x和y同时除以一个不为0的z,并且将z作为其添加维度的坐标,通常可以选择z=1。
内参数
与相机自身特性相关的参数,比如相机的焦距、像素大小等;
从成像平面坐标系到像素坐标系的变换。
上面推导中使用的像点坐标p=(x,y)是成像平面坐标系下,以成像平面的中心为原点。而实际像素点的表示方法是以像素来描述,坐标原点通常是图像的左上角,X轴沿着水平方向向左,Y轴竖直向下。
像素是一个矩形块,这里假设其在水平和竖直方向的长度分别为:α和β。所以像素坐标和成像平面坐标之间,相差了一个缩放和原点的平移。
假设像素坐标的水平方向的轴为μ,竖直方向的轴为ν,那么将一个成像平面的坐标(x,y)在水平方向上缩放α倍,在竖直方向上缩放β倍,同时平移((c_x,c_y),就可以得到像素坐标系的坐标(μ,ν),其公式如下:
$$
\begin{array}{c}
u = \alpha\cdot x+ c_x \
v = \beta \cdot y + c_y
\end{array}
$$
带入
$$
\left{\begin{array}{c}
u = \alpha\cdot f\frac{X}{Z}+ c_x \
v = \beta \cdot f\frac{Y}{Z} + c_y
\end{array}\right. \Rightarrow \left{\begin{array}{c}
u = f_x\frac{X}{Z}+ c_x \
v = f_y\frac{Y}{Z} + c_y
\end{array}\right. 其中,f_x = \alpha \cdot f,f_y = \beta \cdot f
$$
齐次坐标的形式:
$$
\left[\begin{array}{c}\mu\\nu\1\end{array}\right] = \frac{1}{Z}\left[
\begin{array}{ccc}f_x&0&c_x\0&f_y&c_y\0&0&1\end{array}\right]\left[\begin{array}{c}X\Y\Z\end{array}\right]
$$
齐次坐标性质:缩放一个常量因子仍然是相等的:
$$
s(a,b,c)^T=(sa,sb,sc)^T
$$
将Z挪到左边:
$$
\left[\begin{array}{c}\mu\\nu\1\end{array}\right]=Z\left[\begin{array}{c}\mu\\nu\1\end{array}\right] =\left[
\begin{array}{ccc}f_x&0&c_x\0&f_y&c_y\0&0&1\end{array}\right]\left[\begin{array}{c}X\Y\Z\end{array}\right]
$$
相机的内参数矩阵(Camera Intrinsics)K :
$$
K=\left[
\begin{array}{ccc}f_x&0&c_x\0&f_y&c_y\0&0&1\end{array}\right]
$$
K有4个未知数和相机的构造相关,fx,fy和相机的焦距,像素的大小有关;cx,cy是平移的距离,和相机成像平面的大小有关。
相机成像的公式:
$$
p = KP
$$
其中,p是图像中像点的像素坐标, K是相机的内参数矩阵, P是下的三维点坐标。
求解相机内参数的过程被称为**标定**,在**SLAM( simultaneous localization and mapping, 即时定位与地图构建 )**中可以假定相机的内参是已知的,**而在三维重建中内参数则是未知的**,需要手动的标定(比如使用标定板),也有自标定的方法,不过精度较低 。
外参数
在世界坐标系中的参数,比如相机的位置、旋转方向等。
上式三维点坐标是在相机坐标系下的,相机坐标系会随着相机的移动而改变坐标的原点和各个坐标轴的方向。引入一个稳定不变坐标系:世界坐标系,该坐标系是绝对不变,SLAM中的视觉里程计就是求解相机在世界坐标系下的运动轨迹。
设Pc是P在相机坐标系坐标,Pw是其在世界坐标系下的坐标,可以使用一个 3×3 旋转矩阵R和一个 3×1平移向量t,将Pc变换为Pw :
$$
P_c = RP_w + t
$$
其齐次坐标:
$$
\left[\begin{array}{c}X_c\Y_c\Z_c\1\end{array}\right] = \left[\begin{array}{ccc}R_{11}&R_{12}&R_{13}&t_1\R_{21}&R_{22}&R_{23}&t_2\R_{31}&R_{32}&R_{33}&t_3\0&0&0&1\end{array}\right]\left[\begin{array}{c}X_w\Y_w\Z_w\1\end{array}\right]
$$
化简得:
$$
\left[\begin{array}{c}X_c\Y_c\Z_c\1\end{array}\right] = \left[\begin{array}{cc}R&t\0^T&1\end{array}\right]\left[\begin{array}{c}X_w\Y_w\Z_w\1\end{array}\right]
$$
相机的外参数(Camera Extrinsics)T :
$$
T = \left[\begin{array}{cc}R&t\0^T&1\end{array}\right]
$$
结合内外参数得出 相机最终的成像矩阵矩阵 :
从 将真实场景中的三维点投影( 世界坐标系 )到二维的成像平面 ( 图像像素坐标系 )
$$
\left[\begin{array}{c}\mu\\nu\1\end{array}\right] = \left[
\begin{array}{ccc}f_x&0&c_x&0\0&f_y&c_y&0\0&0&1&0\end{array}\right]\left[\begin{array}{cc}R&t\0^T&1\end{array}\right]\left[\begin{array}{c}X_W\Y_W\Z_W\1\end{array}\right]
$$
p=(μ,ν)是像素坐标系中的像素点;
Pc=(Xc,Yc,Zc)是相机坐标系场景中的三维点;
带入外参数,将该坐标变换为世界坐标系Pw=(Xw,Yw,Zw) 。
之后还有一系列畸变矫正、数字化处理等操作暂时不必了解太细。
相机坐标系参数转换
- fx, fy: The focal length used to take image in pixels
- cx, cy: The centre of the image. Ideally it is equal to (height/2, width/2)
- The focal len in pixels is calculated from the Field of View and Sensor Size of camera, as derived from here:
1 | F = A / tan(a) |
Here are the calculation for our synthetic images, with angles in degrees for image output at 288x512p:
1 | Fx = (512 / 2) / tan( 69.40 / 2 ) = 369.71 = 370 pixels |
旋转矩阵
1 | zAxis = origin - lookat |
bug
‘No module named ‘quaternion’’
conda install -c conda-forge quaternion
No module named ‘skimage’
conda install scikit-image
No module named ‘open3d’
conda install -c open3d-admin open3d
No module named ‘pytorch3d’
项目链接:https://github.com/facebookresearch/pytorch3d
ubuntu
conda install pytorch3d -c pytorch3d
window
https://www.cnblogs.com/VVingerfly/p/13502376.html

No module named ‘openEXR’
主要是window报这个错,因为直接pip install openEXR会出现编译问题。
pip install 下载位置\OpenEXR-1.3.2-cp37-cp37m-win_amd64.whl
就可以了。

发生了一个小意外,当时运用openEXR库中的Imath moudle 误导入了imath库,
哈哈哈哈,发现有人用韩文做函数名也是可以的。
AttributeError: Can’t pickle local object ‘Sharpen..create_matrices’
参考:https://blog.csdn.net/weixin_43866860/article/details/93890551
把Pytorch的DataLoader模块,当 num_workers设置为0.
因为window没有Ubuntu的fork()调用。
AttributeError: module ‘numpy’ has no attribute ‘float128’
参考:https://blog.csdn.net/tianxifeng/article/details/103523076
首先去https://www.lfd.uci.edu/~gohlke/pythonlibs/网站下载编译好的二进制安装包PyOpenGL,在pip安装(但还是没有解决,因此去Ubuntu吧。)

Missing key(s) in state_dict: “module.backbone.layers.0.stage_1.layers.0.weight”,
去掉字典里的‘module.’
当前模型框架

数据集由 realsense(现实场景)与cleargrasp(透明物体)两部分组合,其中cleargrasp(透明物体)需要自己生成ground truth
疑问:
单个数据集所给参数不一致,所以单独训练网络? 担心泛化能力。
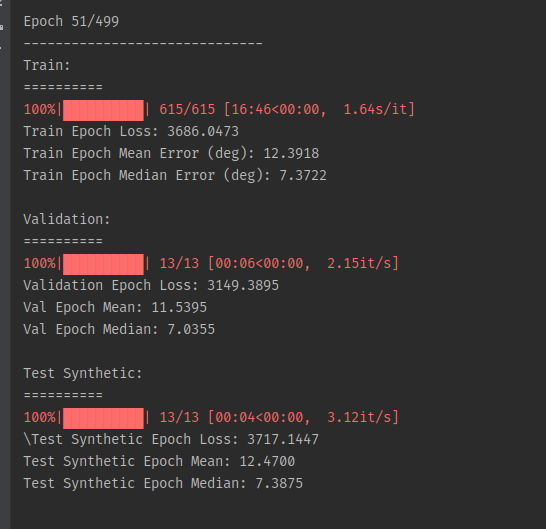
每次训练接着上一次训练,运行12个小时的结果(训练时长太长,一个物品5000张图片,训练集有5种物品2.5W张图片)并且运行时间稍长电脑就会卡。
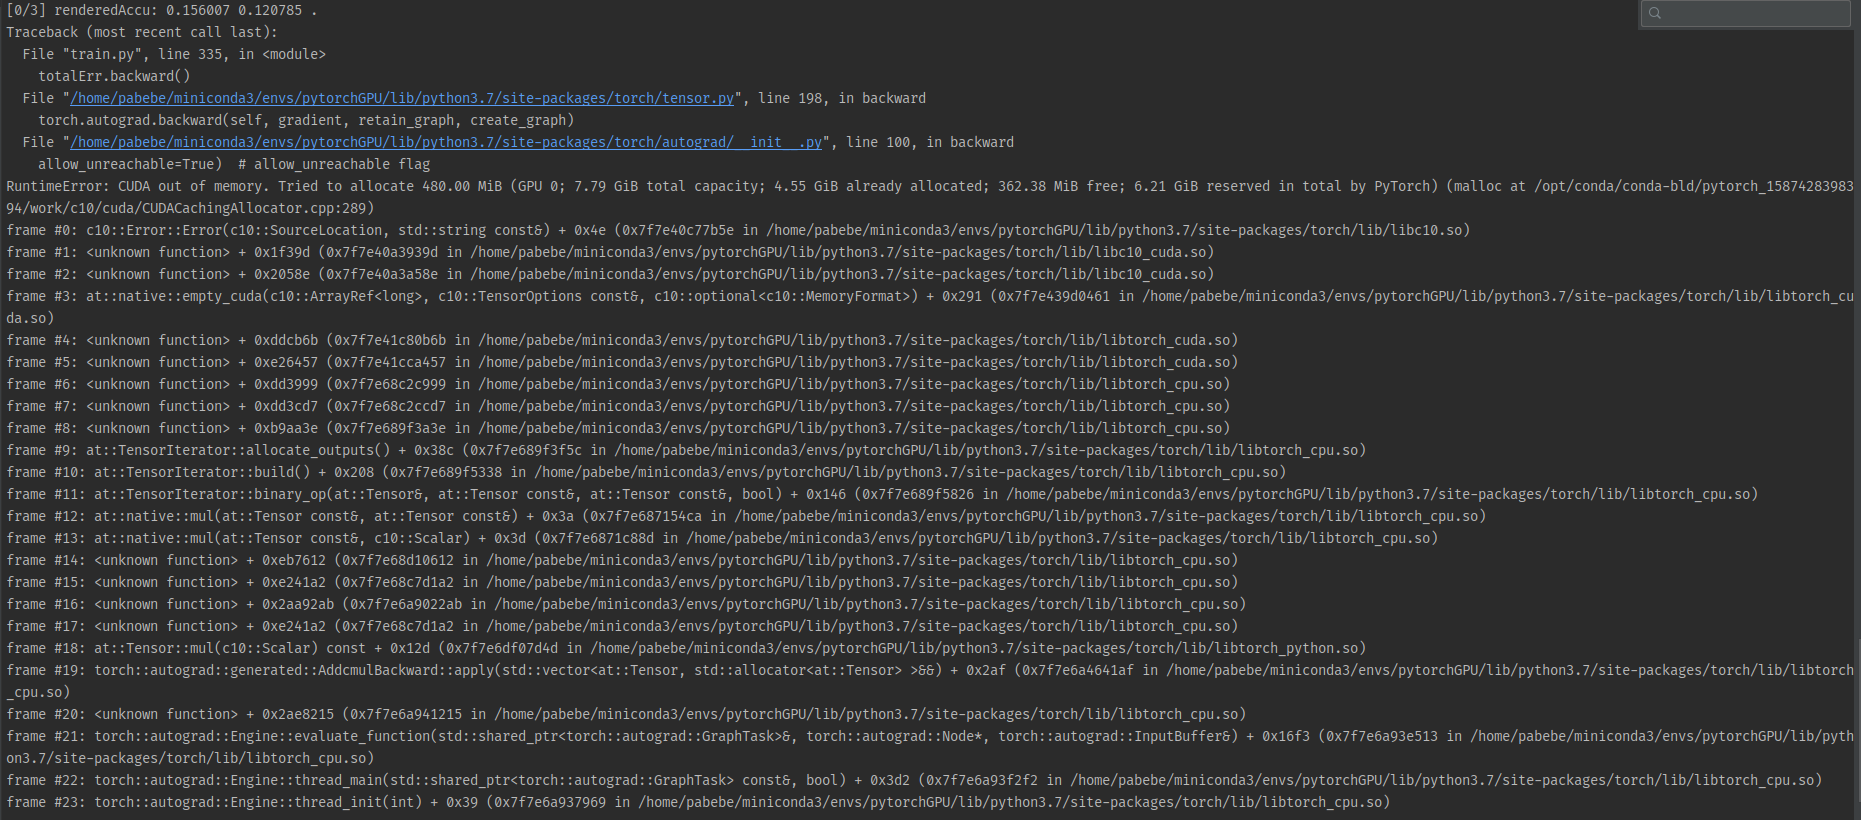
训练Normal时内存不够
RuntimeError: CUDA out of memory. Tried to allocate 480.00 MiB (GPU 0; 7.79 GiB total capacity; 4.55 GiB already allocated; 362.38 MiB free; 6.21 GiB reserved in total by PyTorch) (malloc at /opt/conda/conda-bld/pytorch_1587428398394/work/c10/cuda/CUDACachingAllocator.cpp:289)
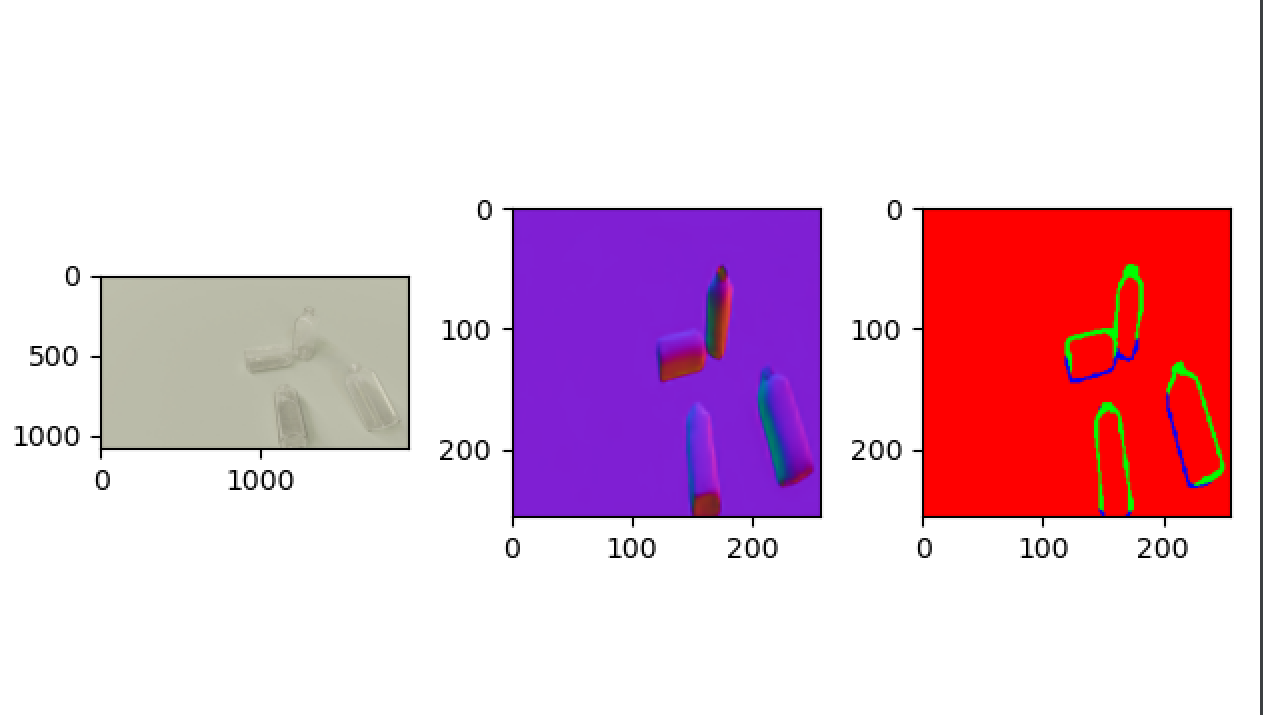
能否用生成的数据做groud truth?
ClearGrasp没有多视角结果图,但是包含大量的透明物体(能够做透明物体的视觉合成)
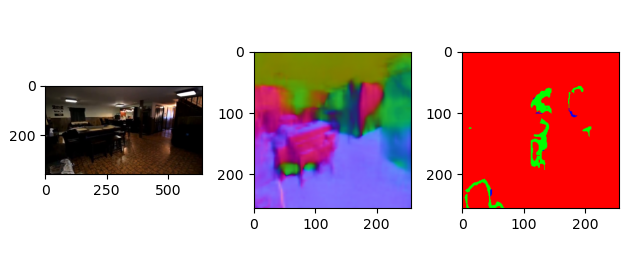
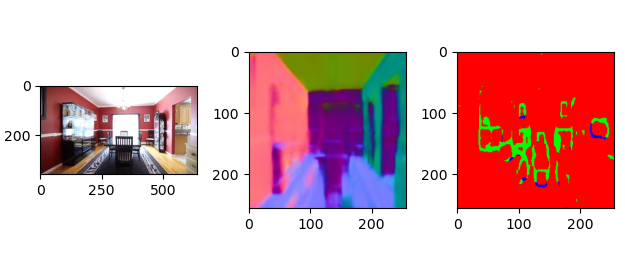
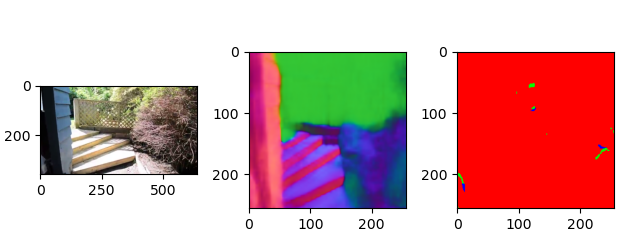
RealEstate10K没有对应的法线轮廓图,迁移过去(细节丢失较为严重,但是对于有孔洞的场景能够表示出来)
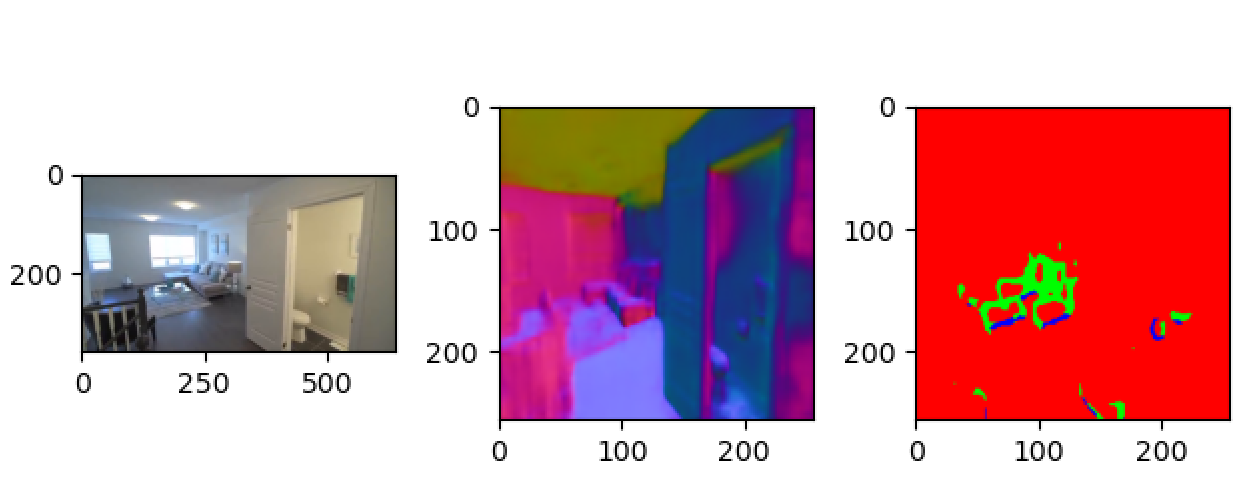
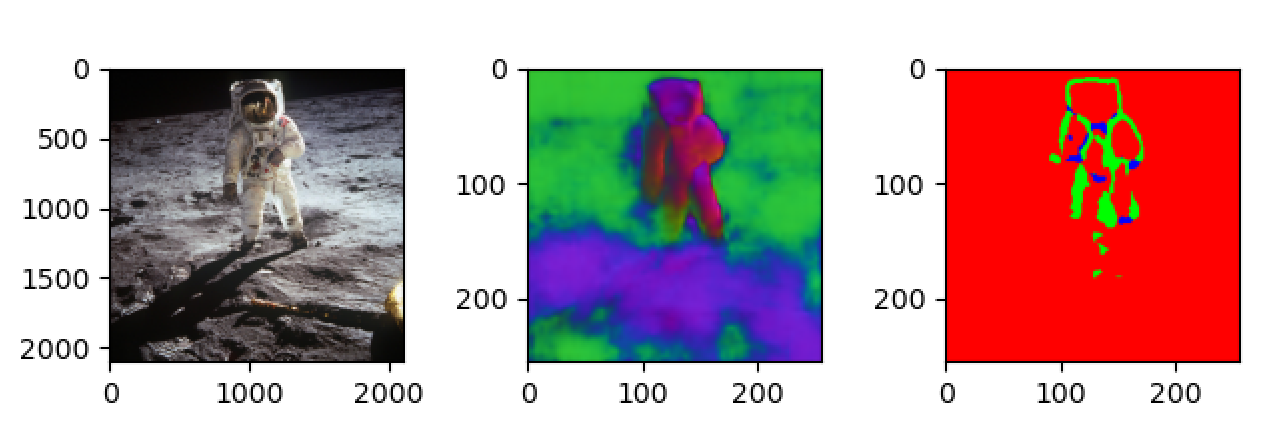
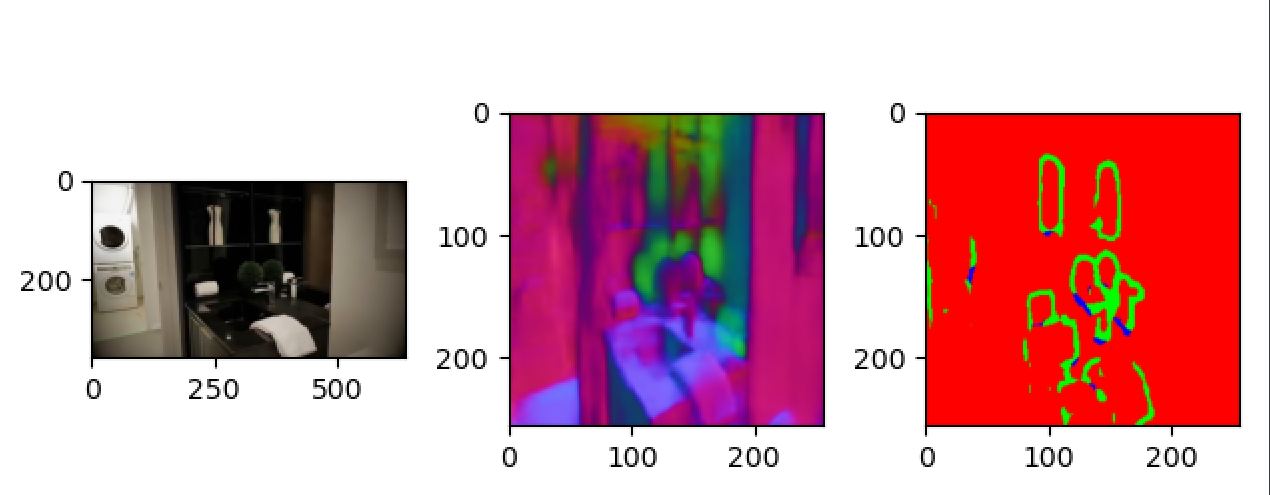
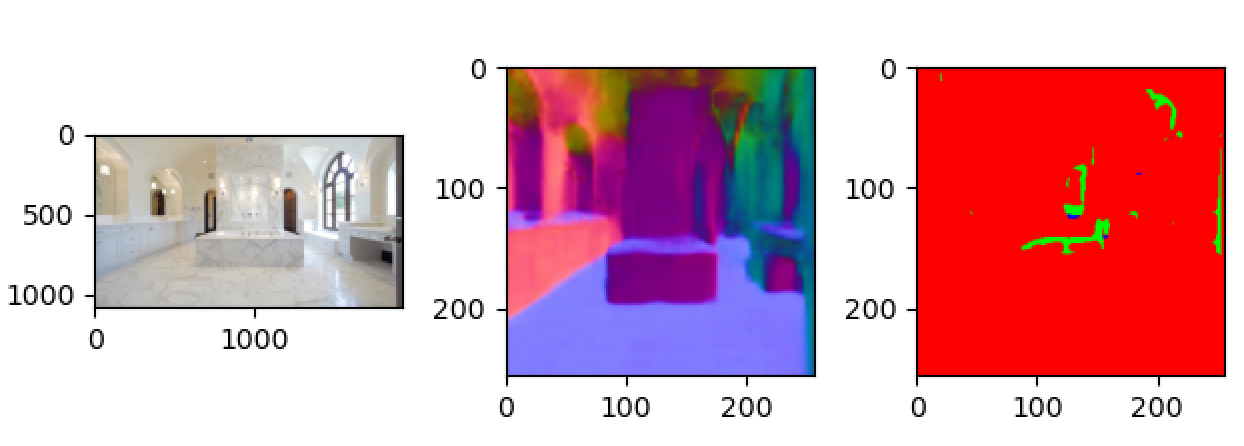
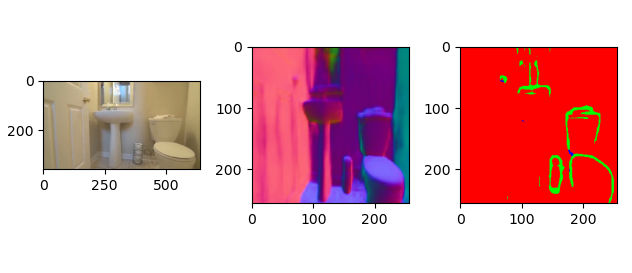
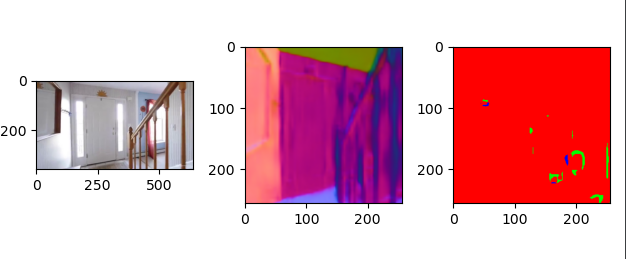
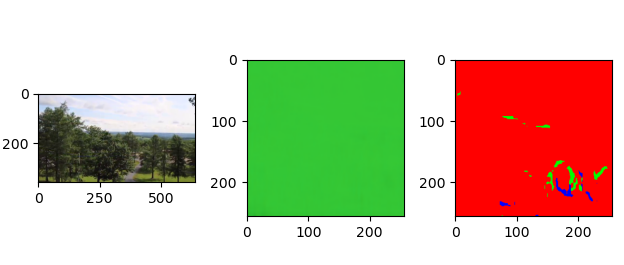
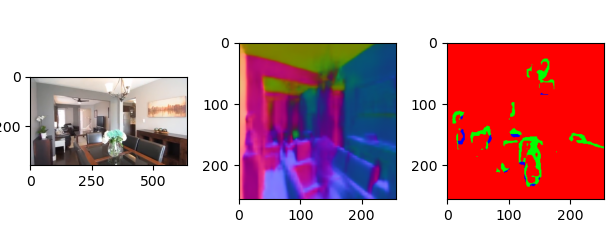
透明多视角数据集的构建
所需
其中Laval数据集(或许可用HDR+ Burst Photography Dataset代替)需要翻墙.
需要和http://vision.gel.ulaval.ca/~jflalonde/ 这位研究员索要,邮箱:jflalonde@gel.ulaval.ca
索要内容如下:
title: Academic research application for The Laval Indoor HDR Dataset
Dear Prof. Jean-François Lalonde,
Thank you for reading!
This is from College of Computer Science and Electronic Engineering, Hunan University, China. I am now a master student and is studying and doing research on Computer Vision.
I am currently constructing my dataset according to this paper that applies to The Laval Indoor HDR Dataset. This paper is “ Through the Looking Glass: Neural 3D Reconstruction of Transparent Shapes” :https://arxiv.org/abs/2004.10904
I am wondering if you could kindly send me the Laval Indoor HDR Dataset and the necessary information about it. I am willing to fill in and sign the terms of use agreement to download the dataset and promise they will be used only for research purposed.
Thank you very much for your kind consideration and I am looking forward to your early reply.
All the best,
Zezu Wang
Zezu Wang(王泽祖)
a graduate student in computer technology,
Hunan University, Changsha, China
Emial:
zezuwang@hnu.edu.cn
Laval Indoor scene dataset: Please download the dataset from this link. We use 1499 environment map for training and 645 environment map for testing. Please turn the
.exrfiles into.hdrfiles, since our renderer does not support loading.exrfiles yet. Please save the training set and testing set inEnvmap/trainandEnvmap/testseparately.来源:HDR文件格式简介
.hdrHDR的全称是High-Dynamic Range(高动态范围)。在此,我们先解释一下什么是Dynamic Range(动态范围),动态范围是指图像中所包含的从“最亮”至“最暗”的比值,也就是图像从“最亮”到“最暗”之间灰度划分的等级数;动态范围越大,所能表示的层次越丰富,所包含的色彩空间也越广。那高动态范围(HDR)顾名思义就是从“最亮”到“最暗”可以达到非常高的比值。
以HDRsoft的高动态范围(HDR)图像格式保存的光栅图像或数码照片; 用于增强数字图像的色彩和亮度范围; 可以进行处理以修正暗影或洗掉图像的某些区域。
.exrOpenEXR是由工业光魔(Industrial Light & Magic)开发的一种HDR标准。OpenEXR文件的扩展名为.exr,常见的OpenEXR文件是FP16(16bit Float Point,也被称为half Float Point)数据图像文件,每个通道的数据类型是FP16,一共四个通道64bpp,每个通道1个bit位用来标志“指数”,5个bit用来存放指数的值,10个bit存放色度坐标(u,v)的尾数,其动态范围从6.14 × 10 ^ -5到6.41 × 10 ^ 4。
以OpenEXR格式存储的光栅图像,这是由Industrial Light&Magic开发的一种高动态范围(HDR)图像文件格式; 支持多层图像,有损和无损压缩以及16位和32位像素; 用于存储深光栅图像以获得高质量图形; 由光栅图形编辑程序和成像应用程序使用.
Optix Renderer: Please download our Optix-based renderer from this link. There is an Optix renderer included in this repository. But it is the renderer specifically modified to render the two-bounce normal. Please use the renderer from the link to render images. We will refer to the renderer in this repository as renderer-twobounce and the renderer from the link as renderer-general in the following to avoid confusion.
Colmap: Please install Colmap from this link. We use Colmap to reconstruct mesh from point cloud.
Meshlab: Please install Meshlab from this link. We use the subdivision algorithm in Meshlab to smooth the surface so that there is no artifacts when rendering transparent shape. This is important when the BRDF is a delta function.
环境配置
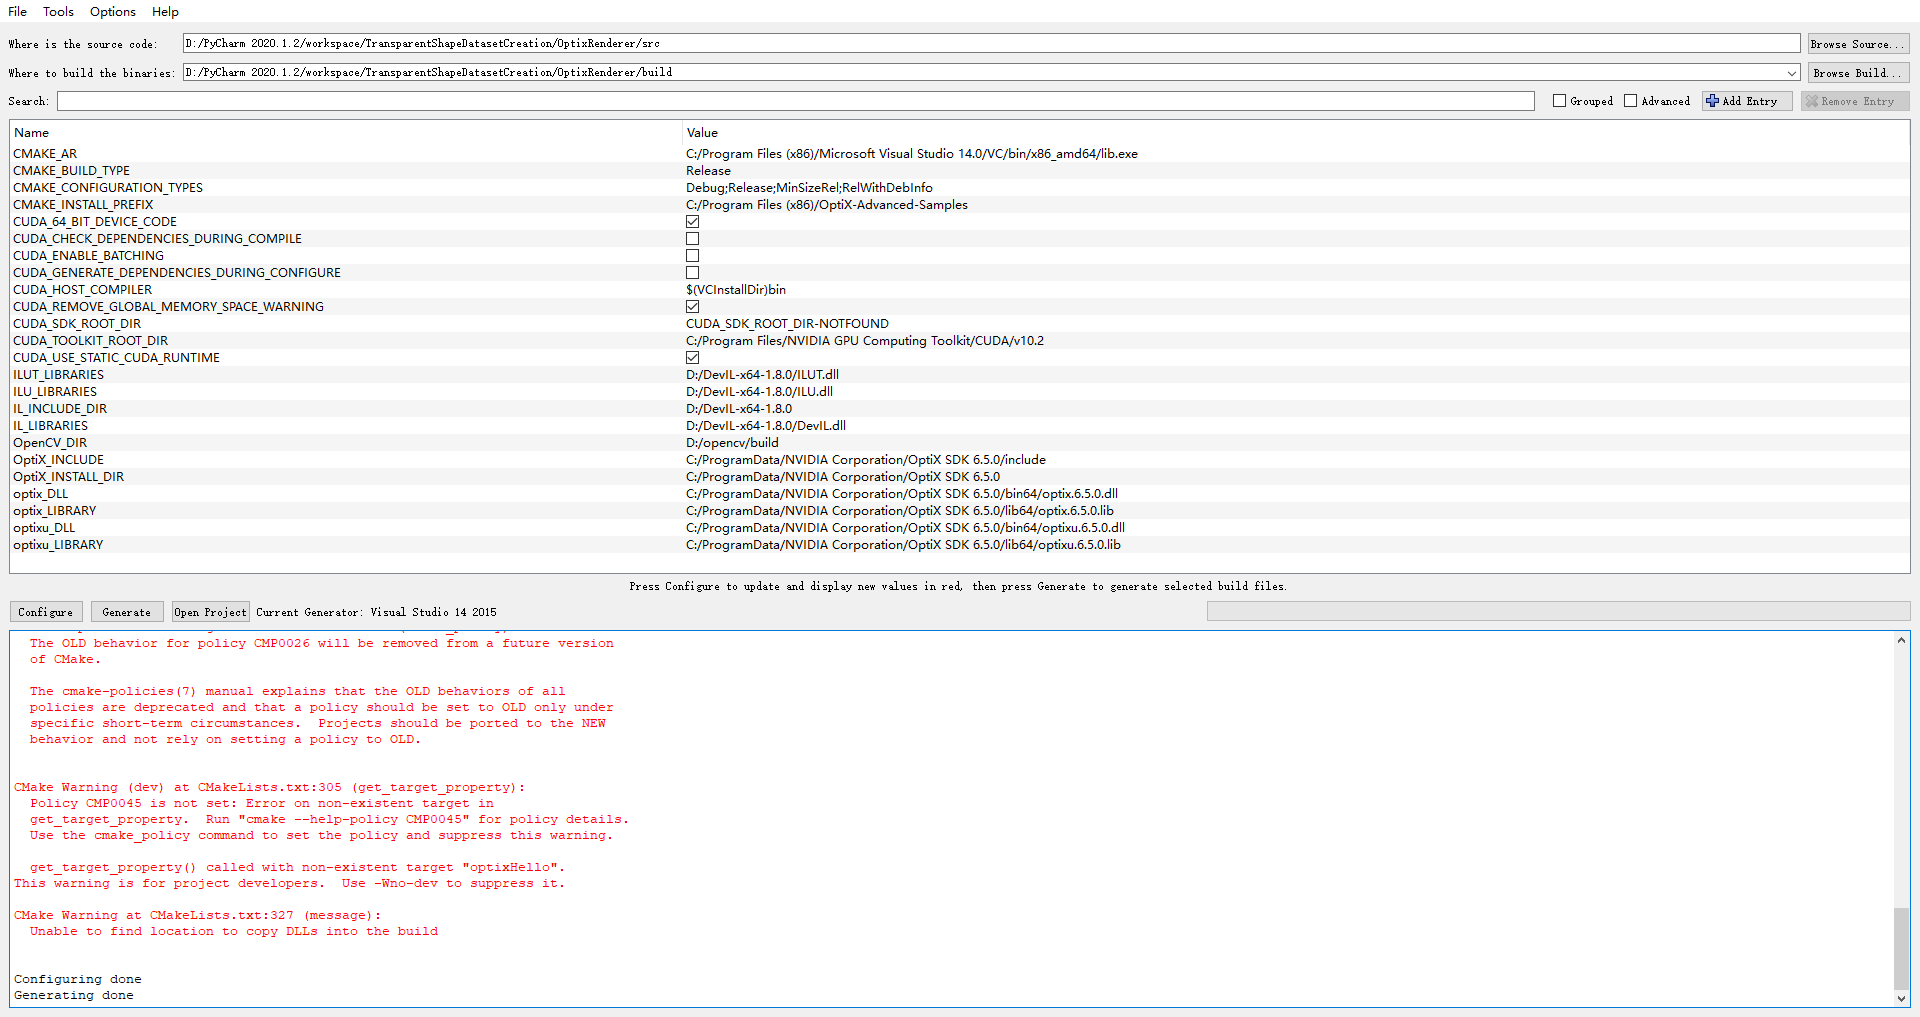
window(一直出错)
编译OptiX SDK 6.5.0
VS2015
## ubuntu
cmake
1 | sudo apt install cmake-qt-gui |
CUDA & OptiX
Installing the latest NVidia Driver, CUDA, and OptiX on Linux/Ubuntu 18.04
编译OptiX SDK7.1.0
1 | 到.../NVIDIA-OptiX-SDK-7.1.0-linux64-x86_64/SDK/下 |
编译OptiX SDK6.5.0
出现”Found OpenGL: /usr/lib/x86_64-linux-gnu/libOpenGL.so
CMake Error at /usr/share/cmake-3.10/Modules/FindPackageHandleStandardArgs.cmake:137 (message):Could NOT find GLUT (missing: GLUT_glut_LIBRARY GLUT_INCLUDE_DIR)”
参考: 在Windows/Ubuntu下安装OpenGL环境(GLUT/freeglut)与跨平台编译(mingw/g++)
1 | sudo apt- install build-essential freeglut3 freeglut3-dev binutils-gold |
搞定
opencv
注意一下python的版本,切换成自己常用的,删掉python2
1 | 测试 |
the DevIL image library
来源:https://zoomadmin.com/HowToInstall/UbuntuPackage/libdevil-dev
1 | sudo apt-get update -y |
以下均用的OptiX SDK6.5.0, 因7.1.0会报错
编译 OptixRenderer(renderer-twobounce,论文已经包含的两次折射反射)
1 | cmake-gui |
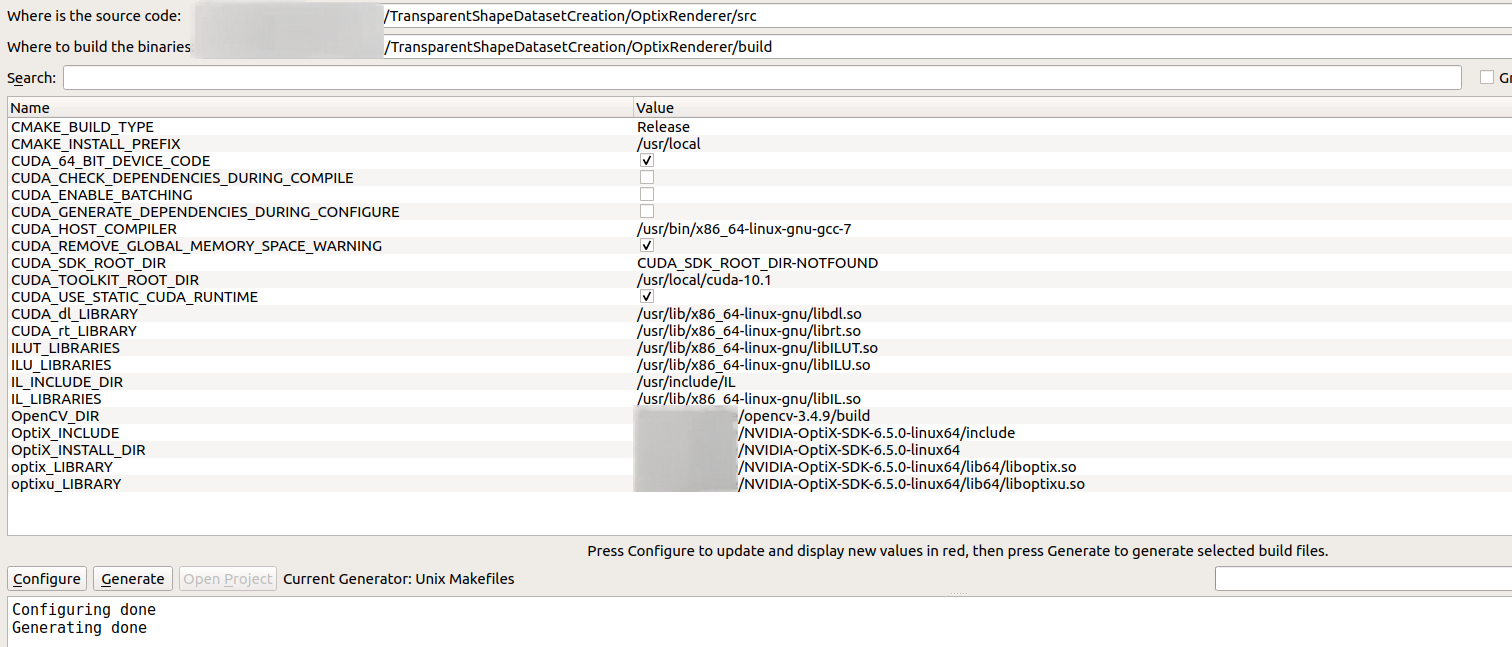
最后,在build目录下打开终端
1 | make |
出现’’[100%] Linking CXX executable ../../bin/optixRenderer’完成
### 编译 OptixRenderer(renderer-general)
步骤同上.
Meshlab
1 | sudo add-apt-repository ppa:zarquon42/meshlab |
Colmap
参考
三维重建_COLMAP安装、使用和参数说明(翻译自官方文档)
1 | 依赖 |
exr文件转hdr文件
1 | sudo apt install pfstools |
http://pfstools.sourceforge.net/download.html
生成
1 | # 生成3000随机透明物体形状 |
sh: 1: xvfb-run: not found
Xvfb是一个在类Unix系统中运行在内存的显示服务器,让你可以没有连接物理显示设备就能运行图形用户界面程序(比如谷歌浏览器)。许多人用Xvfb运行早期版本的谷歌浏览器来做“headless”测试。
sudo apt install xvfb
相机参数
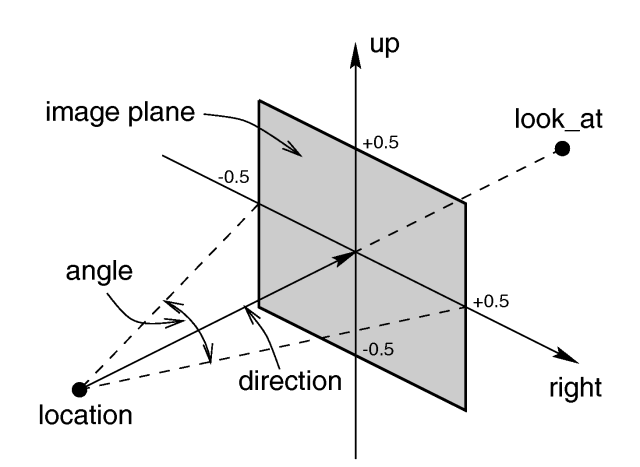
camera中有三个参数,position、lookAt、up。
position,设置camera的位置。也就是把摄像机放在哪里。
lookAt,设置camera看向的位置,即摄像机在position的位置看向哪里。若position设置为(500,500,500),lookAt设置为(100,100,100)。其意思就是把camera放在坐标为(500,500,500)的位置,并把摄像头对准(100,100,100)位置看过去。
up。为摄像头的正方向。假设人眼为摄像头,那么摄像头的正方向就是从嘴巴–>眼睛–>头顶的方向为正方向。那么如果设置up为(1,0,0),则说明摄像头正方向(嘴巴–>眼睛–>头顶的方向)正方向和X轴的正方向平行。若up为(-1,0,0),则与X轴的负半轴平行。同理yz轴一致。(up值决定了你是躺着看,还是站着看还是倒立着看)

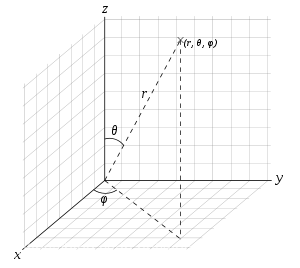
球坐标系
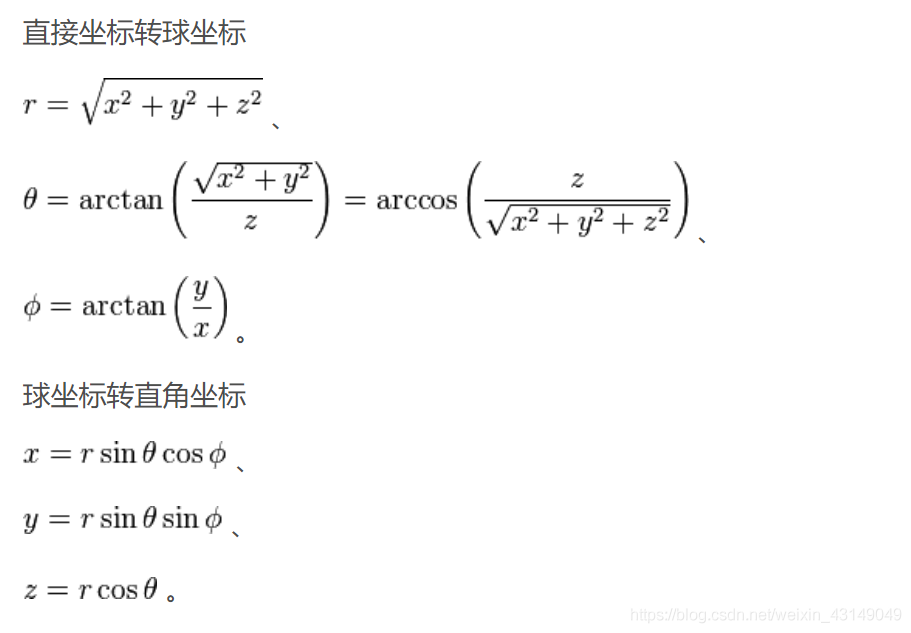
球坐标系是一种利用球坐标(r,θ,φ)来表示一个点 P 在三维空间的位置的三维正交坐标系。
下图描述了球坐标的几何意义:原点O与目标点P之间的径向距离为r,O到P的连线与正z-轴之间的夹角为天顶角θ,O到P的连线在xy-平面上的投影线与正x-轴之间的夹角为方位角φ。
假设 P 点在三维空间的位置的三个坐标是 (r,theta,phi)。那么, 0 ≤ r 是从原点到 P 点的距离, 0 ≤ θ ≤ π 是从原点到 P 点的连线与正 z-轴的夹角, 0 ≤ φ < 2π 是从原点到 P 点的连线在 xy-平面的投影线,与正 x-轴的夹角。当 r=0 时,theta 与 phi 都一起失去意义。当 theta = 0 或 theta = pi 时,phi 失去意义。
训练
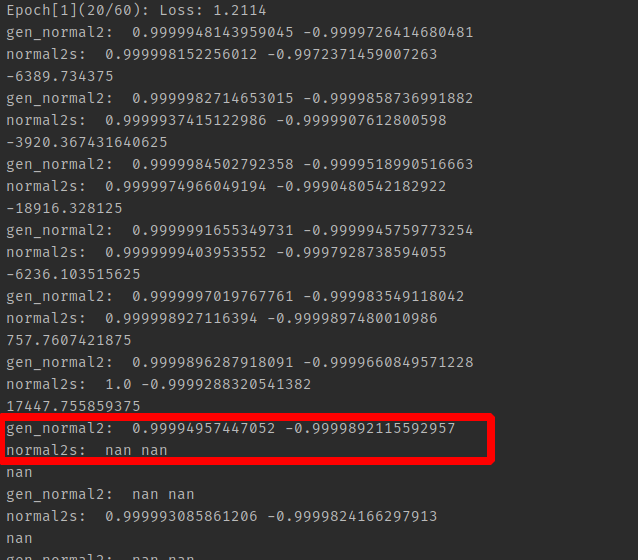
1 | normal2 gt 出现 nan值, 说明之前渲染有问题 |
39\
参考文章
SLAM入门之视觉里程计(2):相机模型(内参数,外参数) 讲的很详细
预处理realEstate10K代码,由于是两年前的版本不适用于现在,因此大幅度修改。